Duct cleaning is an essential maintenance task that often gets overlooked by homeowners. Neglecting to clean your ducts regularly can lead to a buildup of dust, allergens, and even mold, compromising the air quality in your home and potentially impacting your health. In addition, dirty ducts can reduce the efficiency of your HVAC system, resulting in higher energy bills.
To help you maintain a healthy living environment and optimize the performance of your HVAC system, this comprehensive guide will walk you through the process of how to perform duct cleaning effectively. From understanding the importance of duct cleaning to step-by-step instructions, we’ve got you covered.
So, let’s dive in and explore the world of duct cleaning!
How To Perform Duct Cleaning
Performing duct cleaning involves several steps to ensure a thorough and efficient process. By following these steps, you can effectively remove dust, debris, and contaminants from your ductwork, promoting cleaner air and a more efficient HVAC system.
Step 1: Gather the Necessary Tools and Equipment
Before you begin cleaning your ducts, it’s crucial to gather all the necessary tools and equipment. Here’s a list of items you’ll need:
- Screwdriver or drill
- Vacuum cleaner with a HEPA filter
- Brush with long bristles
- Duct cleaning brushes or rods
- Duct tape
- Cleaning solution (mild detergent or specialized duct cleaning solution)
- Protective gear (gloves, goggles, dust mask)
Ensure that you have all these items readily available before proceeding with the cleaning process.
Step 2: Turn Off the HVAC System
To ensure your safety and prevent any damage to the HVAC system, turn off the power supply before cleaning the ducts. This step will also help conserve energy during the cleaning process.
Step 3: Inspect the Ductwork
Before you start cleaning, it’s essential to inspect the ductwork for any visible signs of damage, such as leaks or loose connections. If you notice any issues, it’s advisable to consult a professional HVAC technician for repairs before proceeding with the cleaning.
Step 4: Seal the Registers and Vents
To prevent dust and debris from being released into your home during the cleaning process, seal off the registers and vents using duct tape. This step will ensure that all the contaminants are directed towards the vacuum cleaner.
Step 5: Clean the Supply and Return Registers
Using a screwdriver or drill, remove the supply and return registers from the walls or ceilings. Place them in a bucket filled with warm water and mild detergent. Allow them to soak while you continue with the cleaning process.
Step 6: Clean the Ductwork
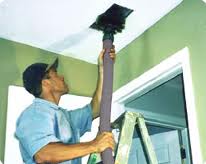
Attach the brush with long bristles to the vacuum cleaner hose. Insert the hose into the ductwork through the supply and return registers, moving it back and forth to dislodge any dust or debris. For hard-to-reach areas, you can use duct cleaning brushes or rods.
Continue cleaning each duct section systematically until you’ve covered the entire ductwork. Pay special attention to bends, joints, and intersections where dust and debris tend to accumulate.
Step 7: Clean the Supply and Return Registers
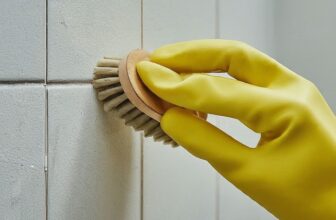
After cleaning the ductwork, remove the supply and return registers from the bucket and scrub them gently with a brush. Rinse them thoroughly with clean water and allow them to dry completely before reinstalling.
Step 8: Replace the Filters
As part of the duct cleaning process, it’s crucial to replace the air filters in your HVAC system. Dirty filters can obstruct airflow and compromise the efficiency of your system. Refer to the manufacturer’s instructions to ensure you’re using the correct type and size of filters.
Step 9: Turn On the HVAC System
Once you’ve completed the cleaning process and replaced the filters, it’s time to turn on the HVAC system. Monitor the system for any unusual sounds or issues to ensure everything is functioning correctly.
Congratulations! You’ve successfully completed the process of duct cleaning, improving the air quality in your home and optimizing the performance of your HVAC system.
Frequently Asked Questions (FAQs)
Q: How often should duct cleaning be performed?
A: Duct cleaning should ideally be performed every 3 to 5 years. However, if you notice excessive dust buildup, mold growth, or have pets in your home, more frequent cleaning may be necessary.
Q: Can I clean the ducts myself, or should I hire a professional?
A: While it’s possible to clean the ducts yourself, hiring a professional duct cleaning service is recommended. Professionals have the expertise, specialized equipment, and knowledge to perform a thorough cleaning and ensure the best results.
Q: Will duct cleaning help with allergies and asthma?
A: Yes, duct cleaning can help reduce the presence of allergens and irritants in your home, potentially providing relief for allergies and asthma. However, it’s essential to address other factors like proper ventilation, regular cleaning, and maintaining low humidity levels for optimal results.
Q: Are there any health risks associated with dirty ducts?
A: Dirty ducts can potentially contribute to poor indoor air quality and aggravate respiratory conditions. They can also harbor mold, which can release spores into the air, leading to allergic reactions or respiratory problems.
Q: Can duct cleaning improve energy efficiency?
A: Yes, duct cleaning can improve energy efficiency by removing obstructions and allowing for better airflow. Cleaner ducts ensure that your HVAC system doesn’t have to work as hard to distribute conditioned air throughout your home, resulting in potential energy savings.
Q: What are some signs that indicate the need for duct cleaning?
A: Signs that indicate the need for duct cleaning include excessive dust accumulation, musty odors, visible mold growth, increased allergies or respiratory issues, and reduced airflow from vents.
Conclusion
Maintaining clean ducts is vital for promoting a healthy living environment and maximizing the efficiency of your HVAC system. By following the step-by-step process outlined in this comprehensive guide, you can perform duct cleaning effectively and enjoy cleaner air and potential energy savings.
Remember to regularly inspect and clean your ductwork, replace filters, and seek professional assistance when needed. With proper care and maintenance, you can ensure that your home’s air quality remains optimal, contributing to a healthier and more comfortable living space.


