Carpet may be soft under your feet, but it doesn’t increase your home value. Difficult to keep clean and easily stained, carpeting may not be the best choice for your active household. A better option is to install beautiful wood floorboards. A hardwood floor can last for decades with regular care, and then it can be refinished and renewed. If you have been looking at hardwood flooring, then you might be dismayed at the high price of installation. Fortunately, installing a new floor is not difficult at all.
Buy the Materials
It all starts by measuring the space to determine square footage. This is determined by simply multiplying the length of the room by the width. Once you have this number, add ten percent to it for scrap. You will also need the following:
- Mallet and tapping block
- Flooring pullbar
- Pneumatic nail gun
- Hardwood flooring nails
- Drill
- Nail set, hammer and size 3d finishing nails
- Wood shims
- Rosin paper and stapler
- Wood floorboards that have been in the room they will be installed in for at least two days.
- Wood saw
- Tape measure and speed square
- Three-foot level or longer
Prepare the Floor
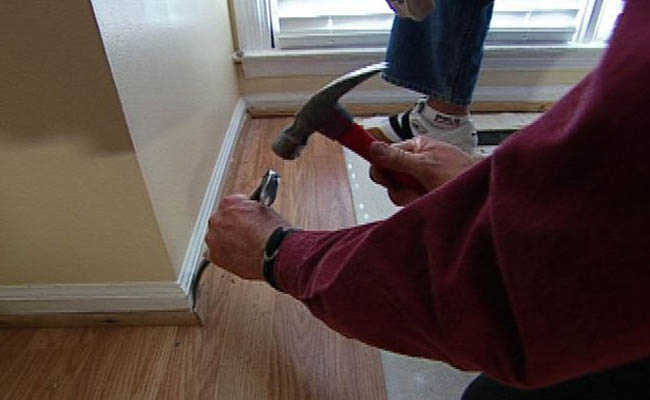
With the carpet removed, go across the floor and hammer in any raised nails. The floor should be completely smooth when you are done. Roll out the rosin paper, and overlap the edges by a few inches. Use the stapler to secure the paper.
Lay the First Row
The first few rows are the hardest because you will not have the necessary clearance to use the nailer. Put the first row in place using nice long boards. Leave a minimum or a quarter-inch between the wood and the wall. Use the level to ensure the boards are straight, and put shims in place along the wall to hold the row in place. Use the drill to pre-drill holes in the tongue at a 45-degree angle, and then secure the boards with the 3d nails. Countersink all nails using the nail set. The next few rows will be laid the same way until you have clearance for the nailer.
Cutting the End Pieces and Reducing Scrap
The quarter-inch gap is needed all the way around the room. When you measure the final piece for a row, remember to account for the expansion gap. Mark the board carefully to be sure you cut the proper end. Never assume that you will remember the cutting point, and mark it with pencil every time. When you select the pieces for the end, try to choose one that is at least six inches longer than what you actually need. The leftover piece can be used for starting the next row on the other side of the room.
Placing Boards
Laying wood floorboards does take a slightly artistic touch. Seams between boards must be staggered to strengthen the floor. When putting the next board in place, look at the seams in the last few rows. The more you stagger them, the more attractive and stable the floor will become. When you decide on the boards for a row, they must be properly secured. Use the mallet and tapping block to gently tap the boards into place along the existing row. There should not be any space between the boards when you nail them. Tap on the sides and the free end to remove open space and achieve a professional finish. At the end of the row, pull the last board tight by using the mallet and flooring pullbar.
Laying hardwood floors is surprisingly easy, and it can save you a small fortune on installation costs. Assemble your tools before you start, and take your time choosing the boards to go down. Maintain the expansion gap on all sides of the floor, and use the mallet to keep the seams tight and straight. Don’t be afraid to set a board aside if the color is off, there are flaws within the grain or it’s overly warped. With a little patience and attention to detail, you will create a wood floor that looks incredible and increases your home’s value.


